VIEW OUR SERVICES
For those looking to build a cohesive and consistent brand presence.
BRAND DEVELOPMENT
type below and hit enter
Search the blog
BUSINESS
photography
BRANDING
Browse by topic
I'm Ali Rae and I love building brands.
So let's build that business one blog post at a time.
Read more about me
FANCY SEEIN' YOU HERE!
PERSONAL
let's whip that brand into shape
BRAND AUDIT
CHECKLIST
FREEBIE ALERT
5 Insider Lightroom Tips: Learn from My Mistakes
May 11, 2020
When I first started using Lightroom, I was overwhelmed by panels, sliders, brushes, and options. I was still learning how to shoot manually when I first began using Lightroom, so let’s just say…my images needed a lot of work. In combination with poor in-camera shooting and only a budding knowledge of Lightroom plus no idea of consistency…well, I had a long way to go to become a professional. But that’s why we’re here now–so that you can learn much quicker than I did!
In my experience I have discovered some pretty nifty capabilities in Lightroom that can take your images from amateur to professional with just a few clicks…uhh, slides? 🙂 So without further ado…
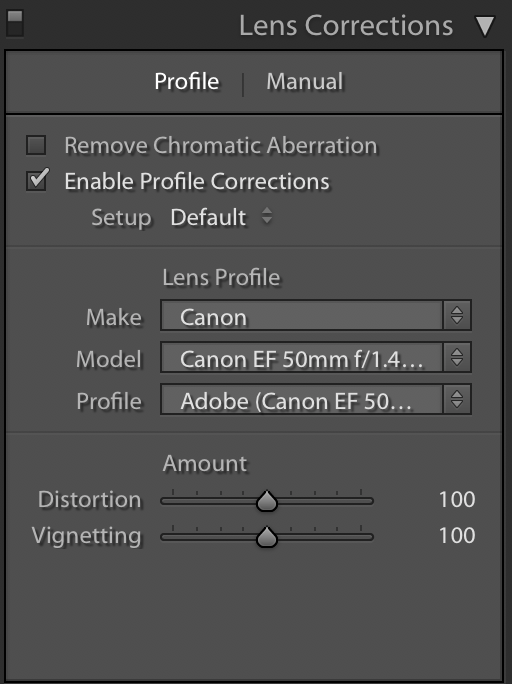
Lens Profile Correction. In the “Lens Correction” panel of Lightroom, there are two subheadings: “Profile” and “Manual.” Under Profile there is a checkbox that reads “Enable Profile Correction.” If you are a light and airy shooter like me, this is super helpful! Any time you take a photo, your lens is going to put some sort of vignetting or distortion to the RAW image. You can correct this by simply checking that box! It typically lightens up the image overall, but especially on the edges and corrects any distortion of the subjects the lens may have caused. Correcting distortions can really help with horizon lines or other straight lines (like buildings). I have this as part of my basic import preset that I apply to all of my images.
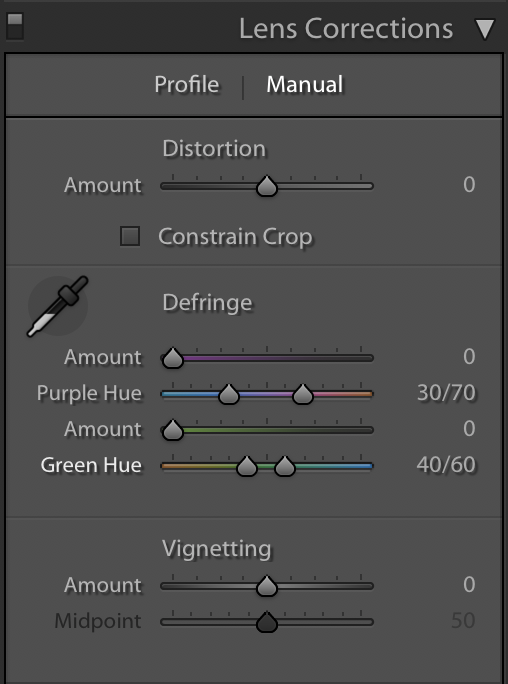
Chromatic Aberration. Now click over to the “Manual” section of the Lens Correction panel. You will see an area labeled “Defringe” with a few sliders with different colors. The two that come into play most often are the purple and green sliders. If you are experiencing a lot of chromatic aberration (like on limbs of trees), this is super helpful! It basically strips the purple color from the edges of those trees/subject. Be careful though–if someone in the image has a purple or pink shirt on, this can sometimes affect that too! Just make sure that you check the entire image before stripping away ALLLL the purple. 🙂
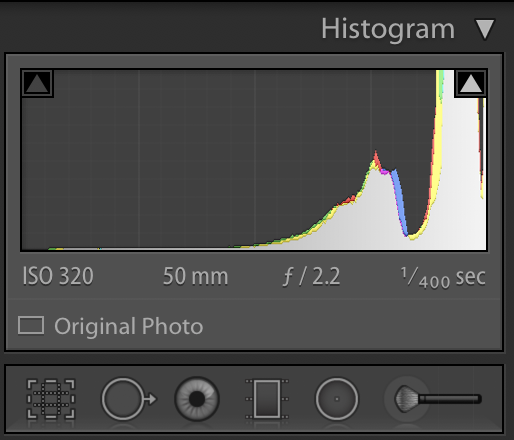
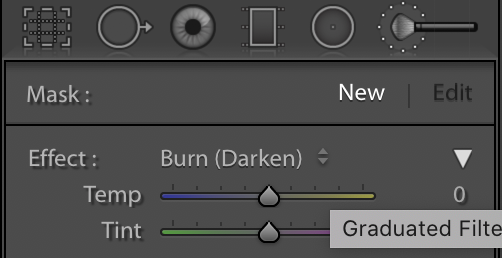
Radial Filter. Take a look at the top tool bar (where you go to crop images and select brushes). The icon with the circle with a dot in the middle is the “Radial Filter” button. Have you ever had an image that you thought was perfect EXCEPT the subjects were slightly underexposed? You can fix that with a radial filter! Basically all you have to do is drag your mouse to put the “filter” around your subjects and then choose what you want to happen within that area–you can darken, lighten, saturate/desaturate, pretty much anything you would do regularly–but only apply to a specific area of the image. I wouldn’t say I use this often, but when I do…it sure does make a difference!!
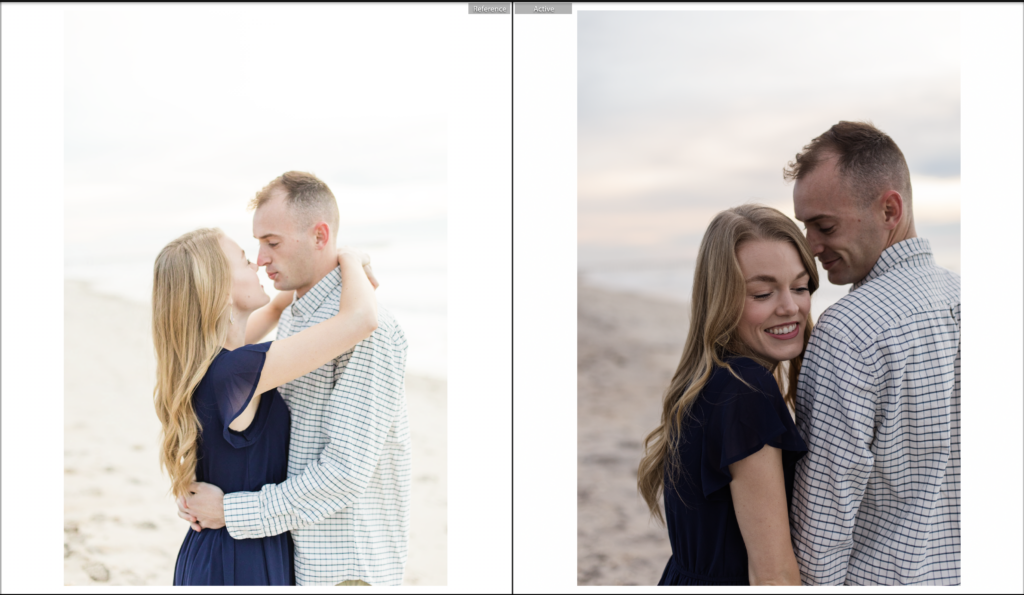
Reference Screen. “Shift+R” has been the best thing to happen to my consistency as a photographer! It brings up a previously edited image of your choosing on the left side of the screen. The other image on the right is the one you are currently editing. Using one of my blog images with the same lighting, I use the Reference screen to compare/match the rest of my images to that one. It ensures consistency throughout an entire session/portion of the wedding day.
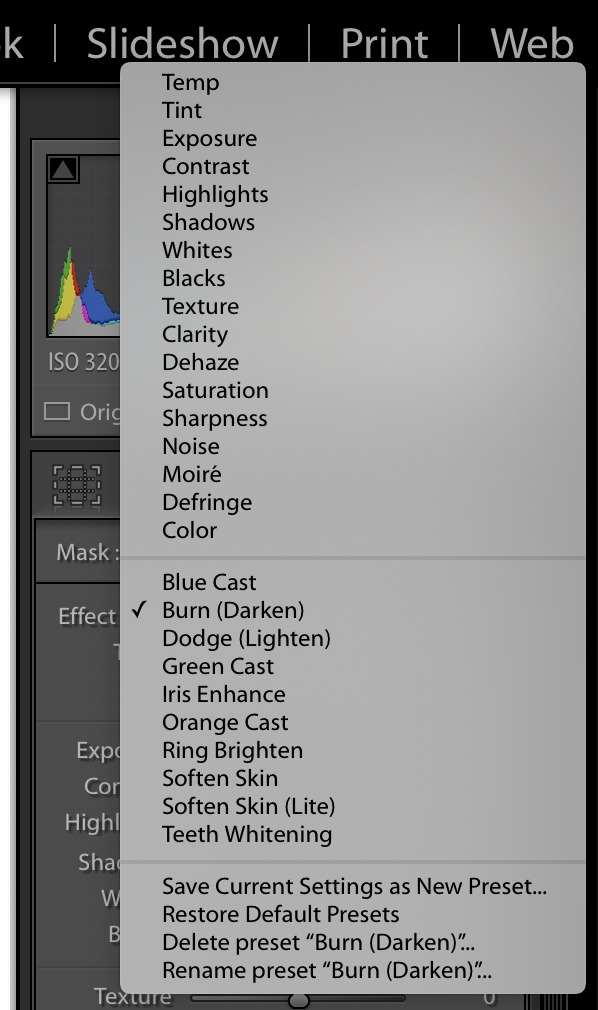
Custom Brushes. Last, but not least! On that same top tool bar where you found the Radial Filter, you will go to find the Brushes as well. It’s the little brush icon all the way to the right. While I use the ones that are provided by Lightroom, I have a few custom ones of my own as well! A couple of mine I use most often are a “Ring Brighten” brush which brightens diamonds for ring shots to really make them dazzle, a “Green Tint” brush if I ever I am in a situation where grass is reflecting back onto the faces of my subjects. These can be super helpful if you find yourself trying to make the same adjustments over and over again.
So there ya have it…my “insider” knowledge of Lightroom. Actually, it’s not really insider knowledge. It’s knowledge I have accumulated through experience and help and advice from other photographers. But I hope that it helps save you some time and take your editing game to the next level.
Like I said, learn from my mistakes and underexposed images with zero consistency!!
Let's talk business.
@aliraehaney
find me on
LET'S WORK TOGETHER
DIY BRAND AUDIT FREEBIE
I do brand case studies...for fun.
Creating Cohesive Brand Identities for Small Businesses
BRAND DEVELOPER
View website terms
View privacy policy
© 2023 ali rae haney productions, llc. all rights reserved. privacy policy. site by Ali Rae Haney + Showit
schedule consult
Ready to build your brand?